Showing posts with label HowTo. Show all posts

Edit Grub2 Boot Options Easily on Ubuntu 11.04

Friday, June 17, 2011

2 comments
A few months back I shared my discovery about editing boot options in Grub2 and how there was a different way to edit the boot options on menu.lst safely. I blogged about that in this post: Missing Your menu.lst? You've Got Grub2!

Having re-installed Ubuntu recently, I wanted to document how to do it within a GUI environment with mouse-click ease. Well, not really. I mean, you do have to type in a few things to actually download the app you need to do the boot options editing for you. But, it is easy and it is inside the picture-pretty interface. No terminal commands are involved and there were no animals harmed during the making of this HowTo. So enough of the dry wit and let's get to it:

1. First, you need to download StartUp-Manager. The easiest way to do that is through the Ubuntu Software Center. You can click on the icon on the sidebar in Ubuntu 11.04:
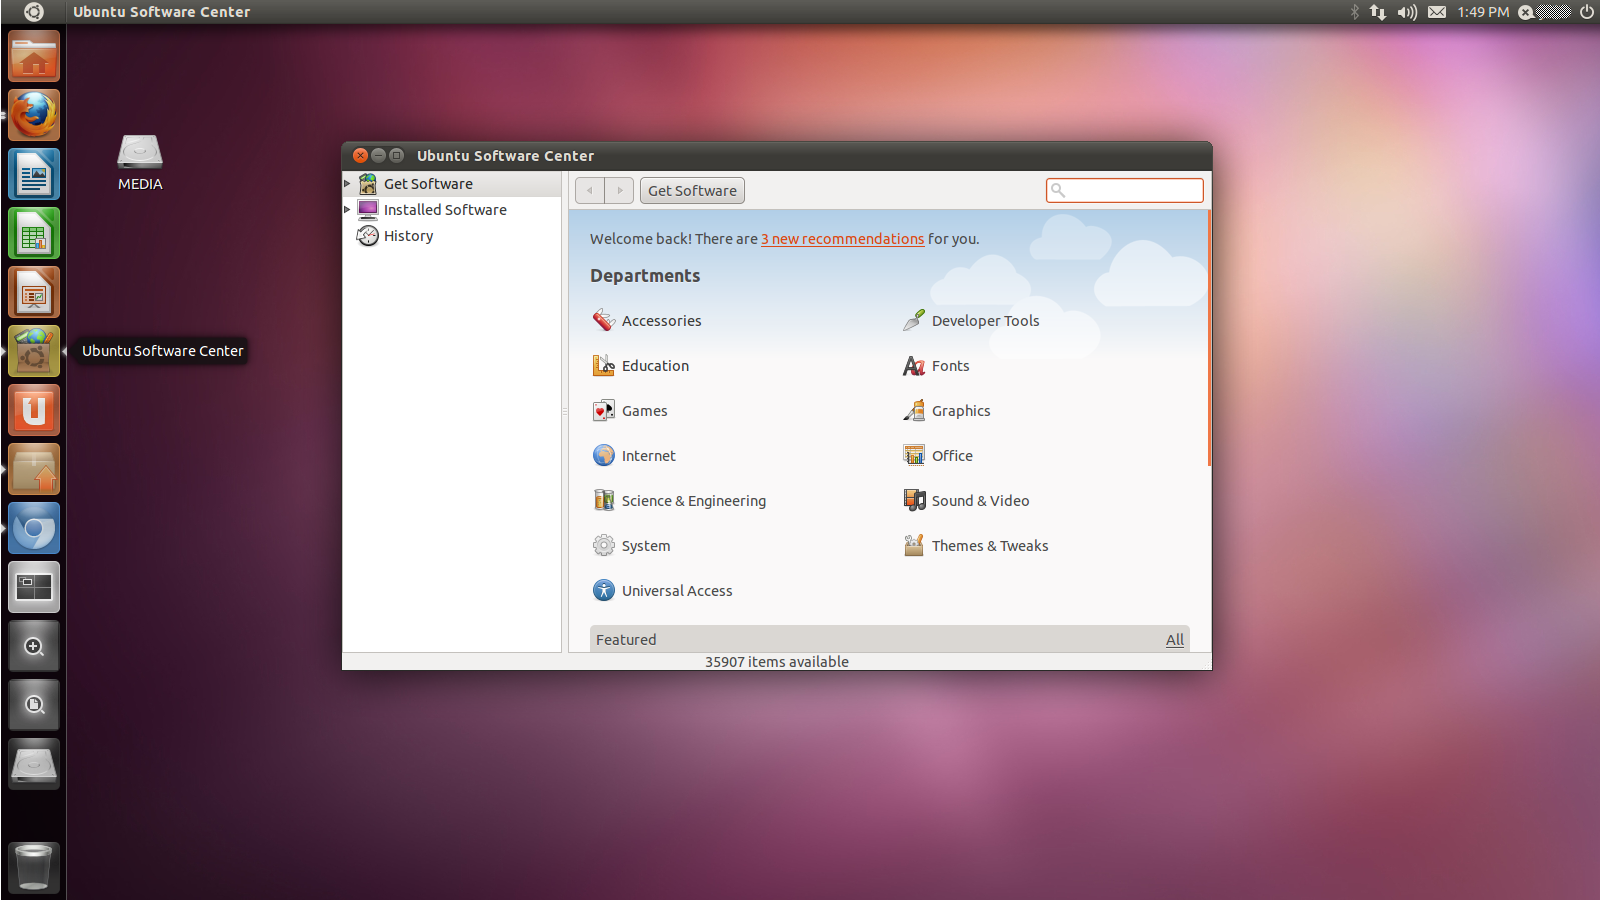


2. Next, use the Search box in the Ubuntu Software Center to find the software you need. You can simply type in "StartUp" and Search will give you choices. StartUp-Manager is usually the first one:


3. Click on the entry for StartUp-Manager to select it. Once you click on the Install button, you'll be asked for your password:


4. Key in your password to authorize the install:


5. You'll be able to check on the progress of the download while it is running: 


6. After it is installed, where do you find it? Unlike previous versions on Ubuntu, where clicking on the Ubuntu logo will bring up a list of applications, 11.04 brings up a Search box instead of a huge list. I'm not a fan of it, but this may be easier for some people. Type in "Start" or "Startup" in Search and you should see StartUp-Manager listed first. Click on the icon to launch:


7. StartUp-Manager will perform a few tasks in the background, basically scan and create a list of items  you can configure for boot options:


8. Once StartUp-Manager is done polling the system for the information it needs, you can toggle the choices to your liking. In the sample below, I chose to shorten the Timeout to 5 from the original 10 seconds. I also chose to have Windows 7 as the Default Operating System. I'm not the only one using this PC, after all. And the wife prefers Windows 7 still. Everything else was pretty much left to the default values. After you're done, just click on the Close button:


9. StartUp-Manager will do the editing of boot options in the background:


10. Reboot and check to see if the options you set are to your liking. Just repeat the process of launching StartUp-Manager and clicking on different choices if you feel the need to change anything.

So much like everything Linux, there is a the terminal way of doing things and sooner-or-later an all-click, painless, graphical solution that some generous geek out there was kind enough to contribute to the community of users. Both methods are usually just as effective as the other. It's just nice to know that even in customizing your Linux install you are given choices. Choice matters for open-source and it's community of users are a great resource for giving every user in it that choice. Whether it be a way of doing things or different applications doing the same basic thing, there is choice. And that is where the crux of it all is!

Keep Passwords Secure with Encryption

Monday, May 23, 2011

0 comments
Using a text file for passwords has always been handy. It's portable and you can send it whenever you need it. But it is inherently insecure. There are a lot of tools that can help you secure your valuable passwords, especially in these days of hack attacks and prevalence of intrusions.

One tool I recommend to friends is Keepass. KeePass is an open source project that encrypts your passwords to keep them protected from prying eyes. It supports AES (Advanced Encryption Standard) and Twofish algorithm to encrypt passwords. These are considered 2 of the most secure ways to encrypt data. In addition, Keepass encrypts all data it keeps and not just the passwords, so even your usernames are protected. It also features on-the-fly encryption, which means even if your computer freezes while you're using it, your data is safe. Keepass is also portable, so it doesn't need to be installed in a particular computer. That means it doesn't leave any traces on a computer you use. Convenient, especially when you have Keepass on a USB stick and you ask to use a friend's computer to access your accounts online. No worries from keyloggers as well. While it is running, you can press a hotkey and Keepass can automatically fill in the password when it detects your logging in with a username you saved in it. You can also generate very hard-to-crack passwords by using its random password generator. Since your using it already for keeping your passwords, you need not worry about remembering a difficult password. Keepass has a ton of advanced user features as well. You can check them out here: http://keepass.info/features.html. Best of all, it is free!

Did I get your attention now? Here's how to start using Keepass in 4 easy steps:

1. Download the portable version of Keepass from http://keepass.info/download.html:

2. Extract the files from the .ZIP folder:

3. Click on KeePass.exe from the extracted files:

4. Start typing in your passwords!

If you need something more robust to work across multiple devices, there are other options. For one, Keeper Data Vault. Keeper Data Vault is compatible with PC, MAC and Linux operating systems and apps for mobile devices like the iPhone, iPod Touch, iPad, BlackBerry(r), Android, Vodaphone 360/Symbian are available. It's available in English, Chinese, Spanish, French, German, Greek, Italian, Japanese, and Portuguese. It uses also uses 128-Bit AES cipher encryption and syncs your data across all your computers and devices. A random password generator comes standard and is aptly called 'Dice'. Keeper also supports automatically filling in usernames and passwords, convenient when using mobile touchscreen devices like iPhones and Android phones.

The most robust security feature on it has to be the Self-Destruct Mode. If set to that option, Keeper erases all data after 5 unsuccessful login attempts. If you tavel a lot and you have your passwords stored in Keeper on a mobile device or laptop, this has to be the single-most important security feature if ever you loose your device or laptop. So if you happen to leave your phone or your laptop on the train or taxi, you know your passwords are still secure. You also don't have to worry about your data on your other computers or devices either. Even with Self-Destruct turned on, your other devices are not affected. Since Keeper syncs data, everything can be restored by using the secure backup & restore features.

If you're interested in trying out Keeper, you can get it here: Keeper 50% Off. If you use that link, you can get a 50% discount by using the code KP50 at checkout.

So keep your passwords safe and download these 2 applications. Be careful out there.

HowTo Install Dropbox in Windows

Thursday, August 26, 2010

0 comments
Dropbox is software that makes it easy to save, share and sync files between different computers and devices. I posted about it here: Dropbox - Save, Share, Sync Files Between Computers. When you install Dropbox, you get a dedicated folder on your computer that is automatically backed up. The nice thing about it is if you have multiple computers and each one has it, Dropbox syncs the files on each. Your files are available everywhere. You get the same file version on each computer updated automatically. What's more, you can go back to previous versions from the last 30 days should you need to. Here's how to install it:

1. Go to  http://www.dropbox.com/referrals/NTEwMjA1MzQyOQ and sign up for an account:


2. After signing up, you'll be directed to the downloads page:


3. Click Run when prompted:


4. The download may take a while. Go get yourself a cup of coffee:


5. When the download finishes and after you've had a few sips of your coffee, click on Run:


6. Click on Install:


7. Finish your coffee while it installs:


8. Since you signed up using my link **hint, hint**, choose I Already Have a Dropbox Account:


9. Type in the email and password you signed up with and edit the computer's name if you want to, then click Next:


10. Choose the 2GB Free option and click Next:


11. I'd recommend reading the info on the 4 slides, to get a little more background on how to use it. Click on Next to move to each one:


12. Finish the install by ticking either on Add a Shortcut on My Desktop or I Want to Choose Where to Put My Dropbox Folder, then Finish (i personally prefer the Desktop, it makes it easier to find):


13. You should have a link on you desktop after clicking on Finish in the previous step:


14.  Click on the icon to access you Dropbox and start drag-dropping your files:


If you want to keep it free, you only have 2GB to work with. But you can increase your free storage if you invite friends. For every person who signs up using your link, you and that person get 250MB each. You can get up to 8GB free! That's 10 GB total, for free. So if you want to try it out, use click my link (http://www.dropbox.com/referrals/NTEwMjA1MzQyOQ) and we'll both get 250MB free ;-)
Free Ground Shipping on Orders $125 or more at EpsonStore
Stop PC Crashes with WinZip System Utilities

Copyright © 2011 Tech Throes | Splashy Free Blogger Templates with Background Images, Trucks