That said, time for a little rant. I hate what I call the 'yes-click' syndrome -- agreeing to everything the software says it will do by blindly clicking 'agree' and 'yes' without reading the fine print. That's plain asking for trouble, because that is exactly what a trojan, adware or malware will want you to do. Legit programs can also install 'extra' stuff that may slow your system down. Bottomline, read the fine print or any message before clicking 'agree' or 'yes'.
Now back to the guide.
The screenshots are from XP. I would have gotten them from Vista or Windows 7 had I had a system that came with it. Unfortunately, I only had an old Dell laptop to test this with. I used an equally old Dell Resource CD. The screens may look different in newer versions but the basics are the same. Here we go:
- Pop in the CD in the CD or DVD drive. If it doesn't start by itself, double-click on My Computer or use a nifty keyboard shortcut by pressing the Windows Key and the letter E at the same time. The Dell Resource CD would have a name like RESOURCE_CD. Double-click RESOURCE_CD :

- If Autorun is disabled (which I should add is the safest option), double-click on the file AUTORCD.exe or AUTORCD to launch the Dell Resource CD installer:

- That should start the installer right away. Read the message and click OK if you agree:

- The Dell Resource CD will then be 'installed'. In reality, I will be installing links to the actual files on the CD, and pleace those links in your Start Menu options. Here it is prepping the installer:

- Read the message and click Next if you want to continue:

- There's no stopping us now. Read the message and click Install if you want to continue:

- And off it goes:

- Click on Finish so you can start installing drivers:

- Once installed, you'll get the following dialog to help you get started:

- Click on Next in the dialog above will bring you to the main page of the Resource CD, where you'll find link to common tasks in the CD. If you check below you'll see links for Utilities, Drivers, Diagnostic Utility and Applications (click on the graphic for a larger pic):

- Choosing Drivers from the page above will bring you to the main drivers page shown below. You'll notice some drivers already have check marks beside them. That means they've already been installed:

- Clicking on any link in the above screen will direct you to another page where specifics of the driver are listed. Clicking in the Extract button will launch the driver installer for this driver (sample below is for the Audio Driver):

- The succeeding screens show the driver install process. In most cases, the default choices will do fine. The first will tell you what you're installing and what it is for:

- Next it will ask where to unpack the drivers. You can change the folder if you wish, but the default will do fine:

- Then it will ask if you want to allow a new folder to be created for the driver:

- Next is a confirmation that the files were unpacked into the chosen folder:

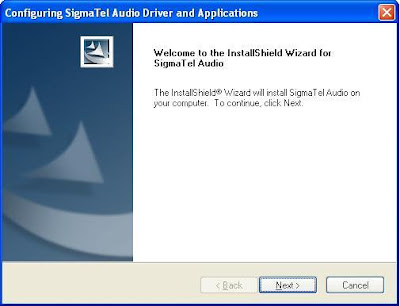
- As in the earlier part where the Dell Resource CD was installed, the InstallShield takes over and installs the necessary files, but not until you click Next:

- And off it goes to copy files and configure settings:

- Once finished, the next screen will ask what to do next. If your done installing drivers, choose Yes then click the Finish button to restart the computer and have the changes set. If you have any other drivers you wish to install, choose No then click the Finish button:

- You can continue installing other drivers by going back to the Driver page of the Resource CD:

Now, any time you wish to use the Resource CD, just pop it in the drive and let it run :-)


2 comments:
hey, thanks. my mother-in-law uses an old Pentium 4 Inspiron and I can point her to this website for this.
hey thanks a lot its very helpful..
Post a Comment